
For a successful upgrade from Windows 10 to Windows 11, it is necessary to meet the operating system's requirements. Many configurations do not meet them, while support for Windows 10 has already ended.
Sometimes, the failure to meet requirements can be minor, and in this case, the desire to upgrade in order to receive regular updates is quite logical.
If the non-compliance is significant, working with Windows 11 upon completion may be accompanied by constant 100% CPU load, not all drivers are compatible, etc. In any case, you can return to Windows 10 without data loss within 10 days. Settings -> System -> (Recovery options) -> Go Back.
1. Bypassing CPU Compatibility Check
1.1 Manually
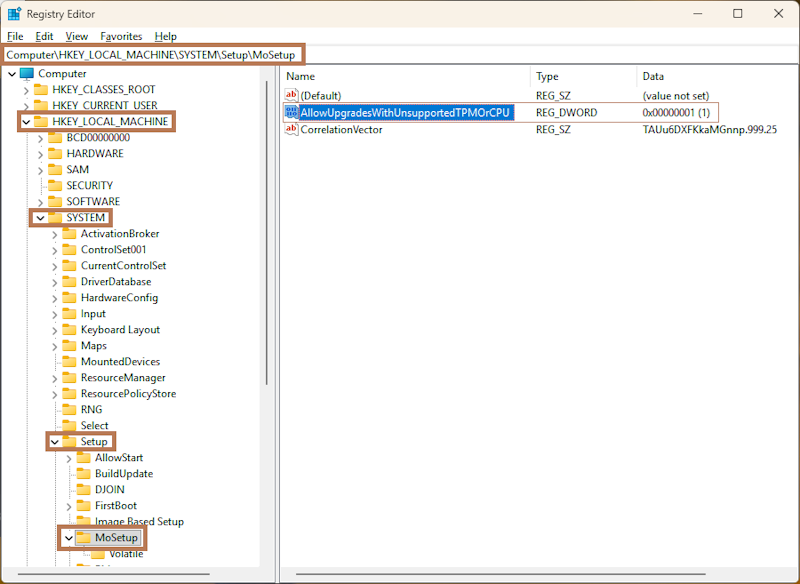
Open the Registry Editor (Win + R) or via cmd -> regedit and add a new DWORD value at the following path:
HKLM\SYSTEM\Setup\MoSetup -> AllowUpgradesWithUnsupportedTPMOrCPU with a value of 1.
1.2 Or via Command Line
Run cmd as an administrator and execute the command:
reg.exe add "HKLM\SYSTEM\Setup\MoSetup" /f /v AllowUpgradesWithUnsupportedTPMOrCPU /t REG_DWORD /d 1
2. Bypassing Compatibility Checks for Other Parameters: TPM, RAM, etc.
2.1 Manually
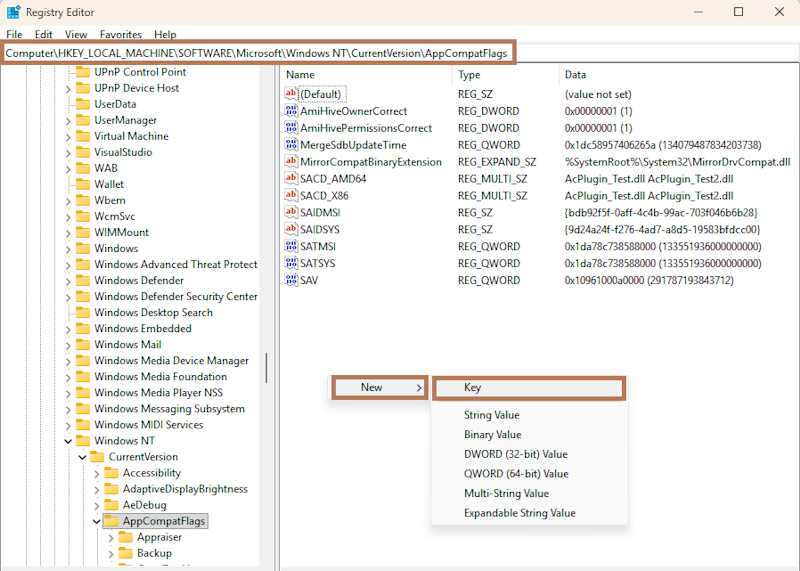
In the registry, navigate to the following path: HKLM\SOFTWARE\Microsoft\Windows NT\CurrentVersion\AppCompatFlags\ and create a new Key named HwReqChk
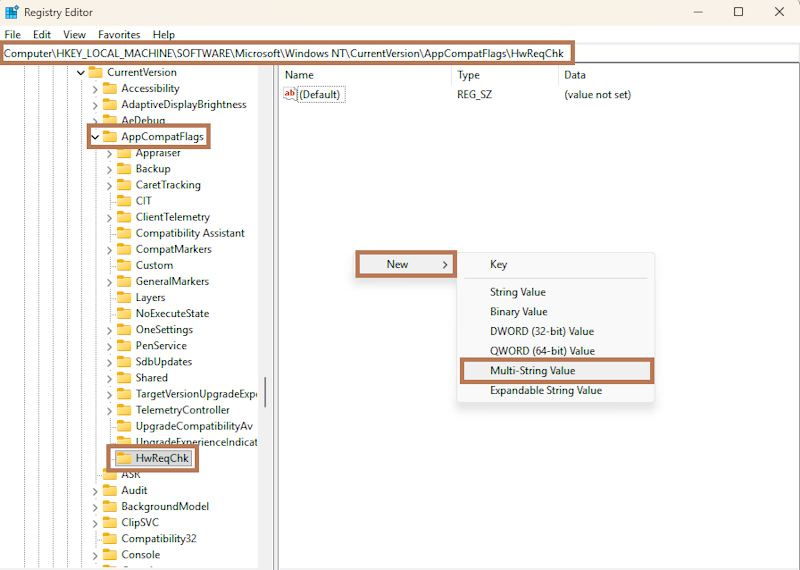
Navigate to the created key HKLM\SOFTWARE\Microsoft\Windows NT\CurrentVersion\AppCompatFlags\HwReqChk and add a new Multi-String value named HwReqChkVars with the following content:
SQ_SecureBootCapable=TRUE
SQ_SecureBootEnabled=TRUE
SQ_TpmVersion=2
SQ_RamMB=8192
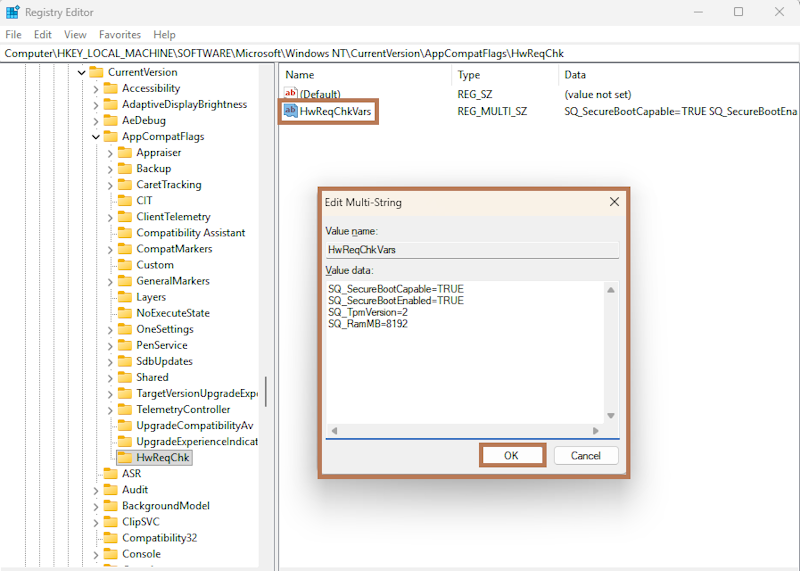
Click OK.
Click OK in the warning that appears.

You can close the Registry Editor.
2.2 Or via Command Line
Run cmd as an administrator and execute the command:
reg.exe add "HKLM\SOFTWARE\Microsoft\Windows NT\CurrentVersion\AppCompatFlags\HwReqChk" /f /v HwReqChkVars /t REG_MULTI_SZ /s , /d "SQ_SecureBootCapable=TRUE,SQ_SecureBootEnabled=TRUE,SQ_TpmVersion=2,SQ_RamMB=8192,"
3. Download and Configure the Windows 11 Migration Tool
Go to the official website at https://www.microsoft.com/en-us/software-download/windows11 and download the Windows 11 Installation Assistant.
By default, if you run it without configuration, it will display a warning about incompatibility if any exists. The settings we made above are intended for the post-check during the migration stage.
3.1 Configuring the Migration Tool
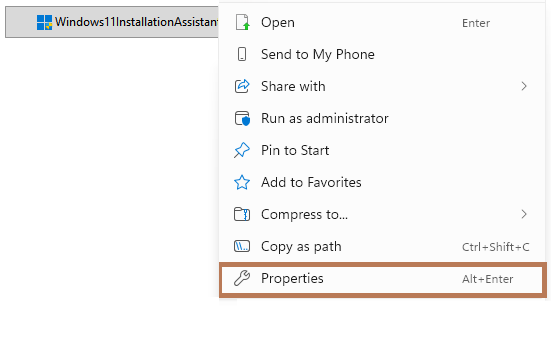
Right-click on the downloaded Windows11InstallationAssistant.exe file and open its properties.
Go to the Compatibility tab and enable the checkbox, setting the run option to Windows 7 compatibility mode. This will disable the initial check.
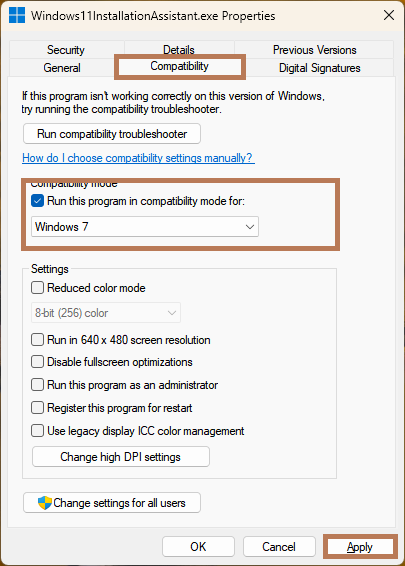
Click Apply.
Run the Windows 11 Installation Assistant.
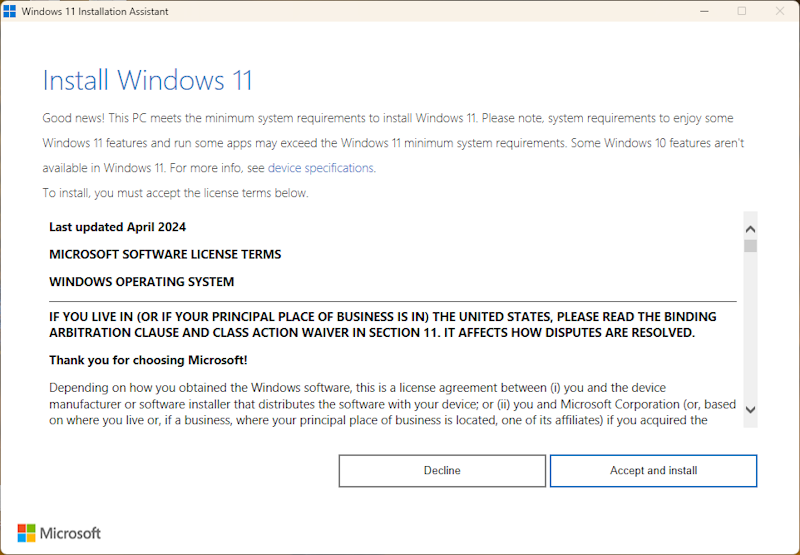
Now your system should pass all checks completely, the migration process to Windows 11 will start and finish automatically.
And remember, using third-party patches and scripts can put the operating system at risk. Use only official utilities from the developer's official website.
This guide describes only the migration process; for a clean installation of Windows 11, use another guide: Solution: This PC doesn't meet the minimum system requirements for installing Windows 11