
![]()
Installing AVideo/YouphpTube is done in a few commands using the ssh console on linux. As an example, we used Ubuntu 20.04 with LAMP preconfigured. All described actions were performed from the root user.
1.1. Download and install the application:
cd /var/www/
apt install git
git clone https://github.com/WWBN/AVideo.git
cd AVideo/
git clone https://github.com/WWBN/AVideo-Encoder.git
mv AVideo-Encoder upload
chown www-data:www-data /var/www/AVideo/ -R
apt install ffmpeg
apt install libimage-exiftool-perl
apt install php7.4-cli php7.4-common php7.4-json php7.4-opcache php7.4-readline php7.4-curl php7.4-gd php7.4-xml
apt install python3-pip
pip3 install youtube-dl
1.2. Let's add a task to the cron:
crontab -e
@daily sudo -H pip3 install --upgrade youtube-dl > /dev/null
Add a task to the very end of the file.
1.3. Prepare the database for data import:
mysql
create database AVideo;
create user AVideo@localhost identified by 'your-password';
grant all privileges on AVideo.* to AVideo@localhost;
create database AVideoEncoder;
create user AVideoEncoder@localhost identified by 'your-password';
grant all privileges on AVideoEncoder.* to AVideoEncoder@localhost;
flush privileges;
exit;
1.4. Prepare a web server, in our case Apache FPM
nano /etc/apache2/sites-available/avideo.conf

ServerName your-site.com
DocumentRoot /var/www/AVideo
 DirectoryIndex index.php
 Options +FollowSymLinks
 AllowOverride All
 Require all granted
ErrorLog ${APACHE_LOG_DIR}/avideo.error.log
CustomLog ${APACHE_LOG_DIR}/avideo.access.log combined
Add to the file and save, after changing the domain to your own, if there is no domain, replace it with localhost.
Activate the created configuration:
a2ensite avideo.conf
a2enmod rewrite
systemctl restart apache2
a2dissite 000-default.conf
1.5. We proceed to install in the browser by opening http://your-server-ip/
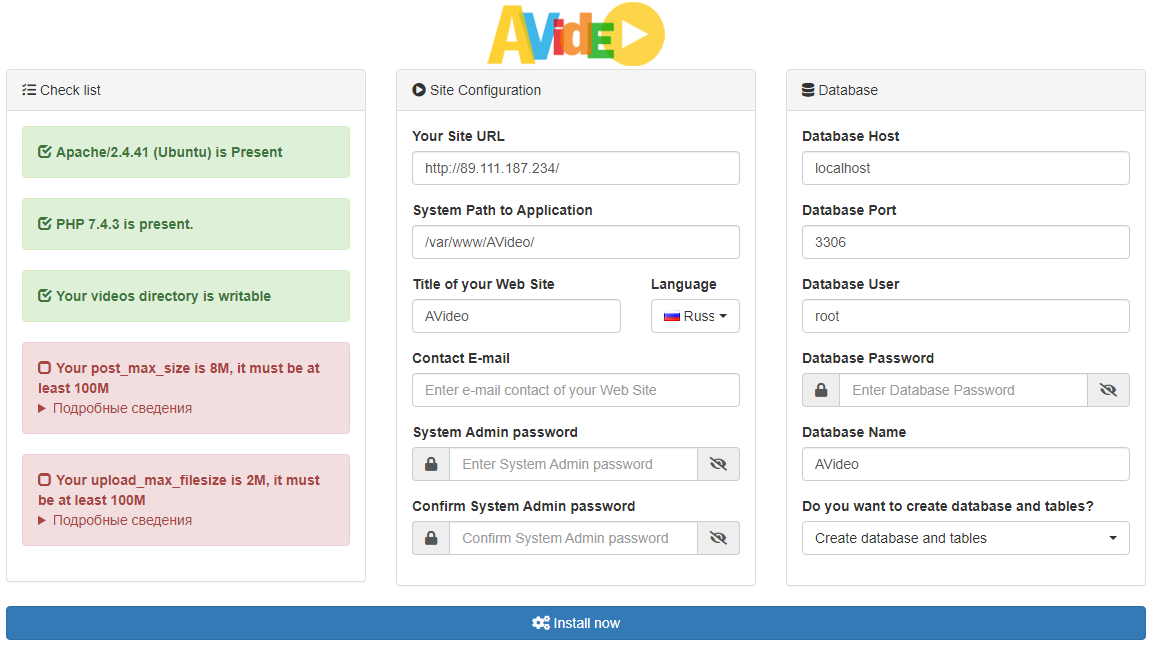
Let's fix the warnings that are marked in red:
nano /etc/php/7.4/apache2/php.ini
nano /etc/php/7.4/fpm/php.ini
Find the lines in the files:
post_max_size = 8M
upload_max_filesize = 2M
And replace with the values below:
post_max_size = 1024M
upload_max_filesize = 1024M
Then you need to restart the services:
systemctl restart apache2
systemctl restart php7.4-fpm
1.6. Fill in the fields: Database User, Database Name, Database Password with the data that you specified when creating the databases:
Database User = AVideo
Database Name = AVideo
Database Password = your-password
After successful installation, delete the installation folder:
rm /var/www/AVideo/install/ -r
2. Installing a video decoder, in our example, we install it on the same server. With large volumes of video uploads to the server, we recommend using a separate server for it. Since on an industrial scale the first server is used to view and store the decoded video, and the second to convert files. Since the decoding stage uses significant CPU resources, these services are often distributed to different servers.
Follow the link by opening http://your-server-ip/upload and fix the default php values:
nano /etc/php/7.4/apache2/php.ini
nano /etc/php/7.4/fpm/php.ini
Find options:
max_execution_time = 30
memory_limit = 128M
Change them to these:
max_execution_time = 7200
memory_limit = 512M
Then apply the settings by restarting the services:
systemctl restart apache2
systemctl restart php7.4-fpm
2.1 Refresh the page and fill in the data for the second database:
Database User = AVideoEncoder
Database Name = AVideoEncoder
Database Password = your-password
А Также другие параметры
Allowed Avideo Sreamers Sites = http://your-server-ip/
AVideo Streamer Site URL = http://your-server-ip/
AVideo Streamer Site admin = admin
AVideo Streamer Site admin = The password created for the admin user in step 1.5
After installation, delete the directory for security purposes
rm /var/www/AVideo/upload/install/ -r
3. Go to the settings on the main URL http://your-server-ip/
In the administration menu, go to settings -> site settings -> additional settings. Change the encoder URL to http://your-server-ip/upload/. Save your settings, clear your cache directory, and create a new sitemap.
Now log out and log in again. If you click on the video and audio encoding button on the top right, you will be taken to your own encoder to download videos. It should be noted that the encoding speed depends on the processor power of your server. This does not require a lot of RAM because the encoder will copy the video to a temporary file in the upload directory (/var/www/AVideo/upload/videos).
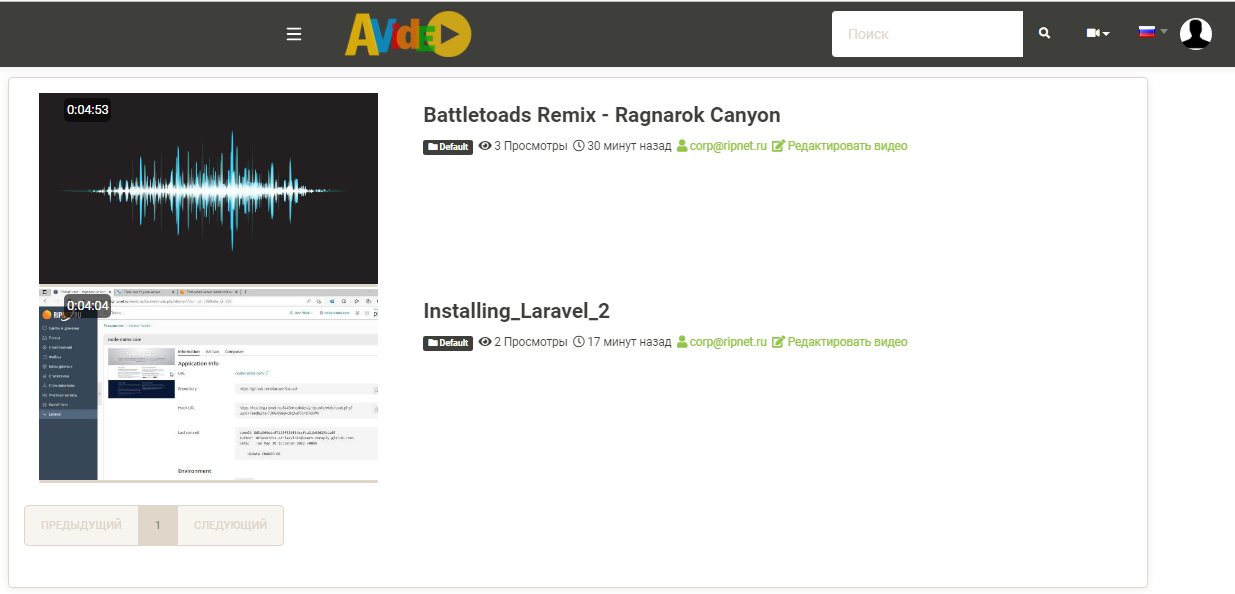
After downloading the test files, the main page will look like this:
Administration menu
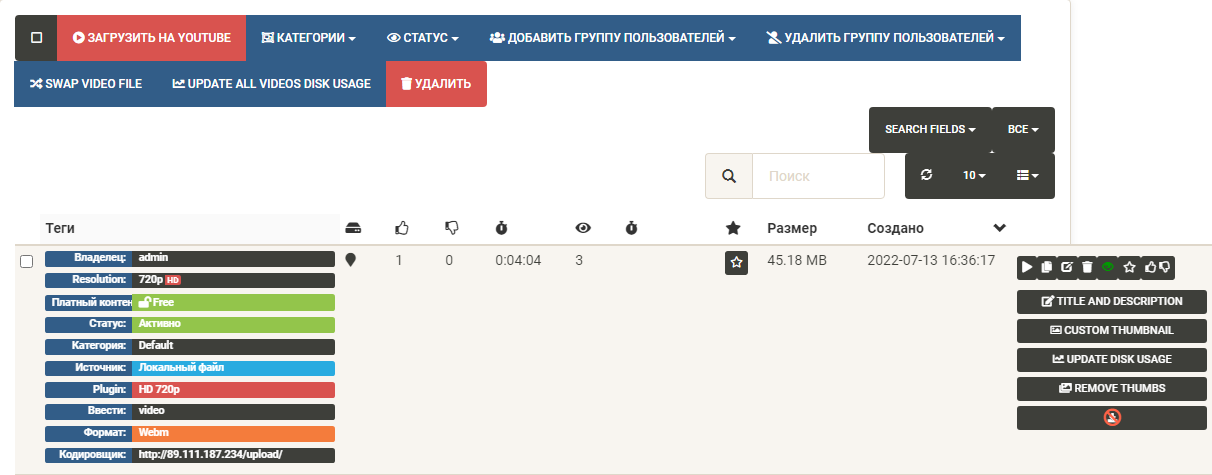
This completes the basic installation and configuration. Video and audio files are successfully encoded and displayed for viewing. This CMS has a large number of settings and features, including importing and exporting videos from Youtube.
We compare both and think MediaCMS better.