
We previously discussed how to set up and use NekoBox in the Microsoft Windows operating system.
In this guide, we will show you how to make routing flexible. To do this, open settings -> route settings.
1. Adding Routing Rules
1.1 Settings Window
Don't forget to enable the System Proxy option.

1.2 Basic Routing Rules
Switch the operating mode to bypass.
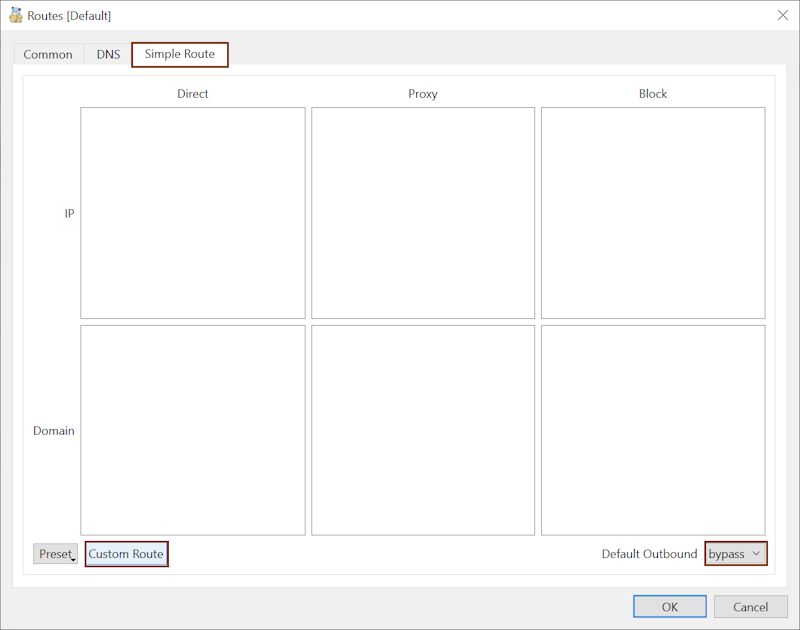
1.3 Custom Routing Rules
Add rules and save. The application will restart with the new configuration.
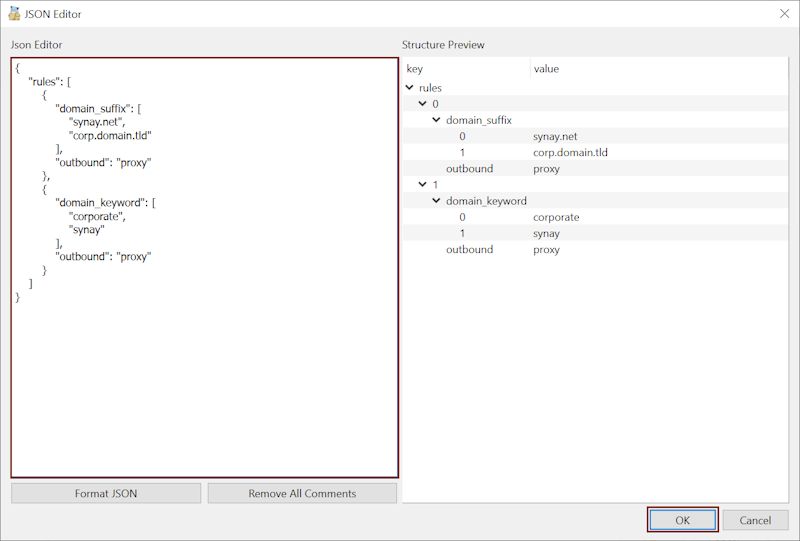
2. Routing Rules
2.1 By Domains
The first rule works by domains and is applied when there's a match. For example, if you want to allow access to corporate resources from all applications and browsers:
{
    "rules": [
        {
            "domain_suffix": [
                "2ip.ru",
                "corp.compnay.domain.tld"
            ],
            "outbound": "proxy"
        }
    ]
}
2.2 By Keywords
The second rule works by finding matches in the domain name's address:
{
    "rules": [
        {
            "domain_keyword": [
                "synay",
                "corp",
                "companyname"
            ],
            "outbound": "proxy"
        }
    ]
}
2.3 By Process Name
You can also specify that a particular application in the system should work through a proxy:
{
    "rules": [
        {
            "process_name": [
                "firefox.exe",
                "myapp.exe",
                "company-app.exe"
            ],
            "outbound": "proxy"
        }
    ]
}
This type of setting sends traffic to the proxy only for the specified rules. All other traffic passes directly through the internet provider, bypassing the corporate proxy server; this is controlled by the bypass option in the application settings.
Flexible routing allows you to use your company's corporate resources conveniently and securely, without burdening them with unrelated traffic and requests. With this setup, all other transit traffic can be blocked on the corporate proxy server.
Flexible routing is convenient for everyday use, as it allows you to work with all resources in a single browser. Routing happens automatically according to the defined rules.
You can check the rules' operation using various services that show your current IP address, for example, through our website, by selecting the "My IP" option in the site's header.