

Installation of CMS Bitrix is performed in several commands using the ssh console in linux. We used CentOS 7 as an example, you can find more detailed information on the requirements on the developer's website. The server should not have any third-party services, it should be clean.
1. Download the installation script and run:
wget http://repos.1c-bitrix.ru/yum/bitrix-env.sh
chmod +x bitrix-env.sh
./bitrix-env.sh
Wait for the installation process to complete. (Bitrix Environment bitrix-env has been installed successfully.)
2. Check the installation by opening in a browser http://your-server-ip/
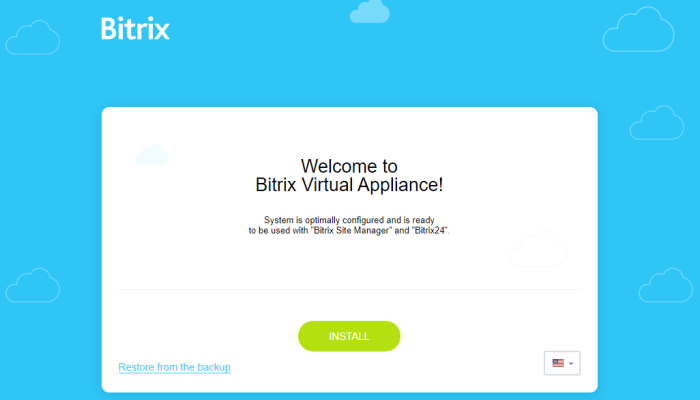
A menu for selecting a product for further installation will open. Further, when choosing a product, you will need to fill in the data, including the main domain, email, come up with a login and password for the administrator account. Configure your domain by specifying the server ip in the A record in the DNS editor. Go to your domain in the browser and use it instead of ip.
3. Select the desired product and follow the instructions in the browser.
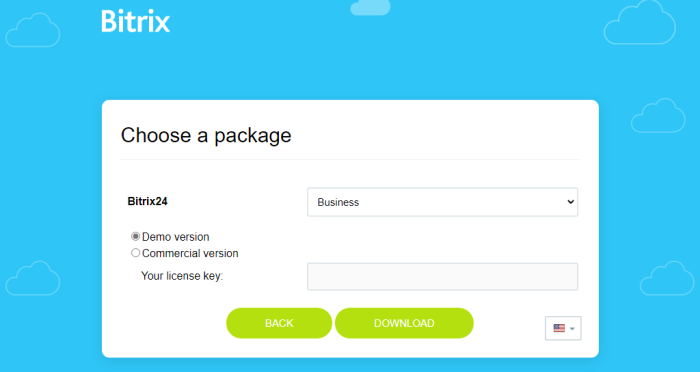
For the online store, it will also be asked to fill in the details of the organization, in the future, these data can be changed in the administrator section. If this is your first installation, we recommend installing it with demo data - a catalog of products with a typical template and already configured basic functionality will be created, this will help you quickly understand the settings.
Installation completed.
P.S. 1C-Bitix is a commercial cms, but in order to test and see how this cms looks in operation, it is possible to install a trial version, if you already have a key, you can use it during the installation process, step 3.