
 |
このガイドでは、仮想サーバーにWordPressアプリケーションをインストールします。同じ作業を繰り返さないように、Debian 12用のWebスタックを使用します。この構成は、PHPとMariaDBを必要とするWebアプリケーションを迅速に展開するために特別に設計されています。公式サイトから最新バージョンをダウンロードし、ブラウザを通じてインストールします。必要なすべてのサービスはすでにインストールされ、設定されています。また、事前にWordPressがインストールされたVPSサーバーを注文することもでき、その際は管理用のログイン情報とパスワードを指定するだけで済みます。 |  |
| 1. WordPressの最新バージョンをダウンロード |
|
apt update && sudo apt upgrade
wget https://wordpress.org/latest.zip
apt install unzip
mkdir -p /var/www/
unzip latest.zip -d /var/www/
mv /var/www/wordpress /var/www/domain.tld
2. データベースを作成して設定を書き込みます
mariadb -u root

create database wpdomain;
grant all privileges on wpdomain.* to user@localhost identified by 'your-password';
flush privileges;
exit;
次に、このデータを wp-config.php ファイルに指定します。
cd /var/www/domain.tld/
cp wp-config-sample.php wp-config.php
nano wp-config.php

/** WordPressのデータベース名 */
define('DB_NAME', 'wpdomain');

/** MySQLのデータベースユーザー名 */
define('DB_USER', 'user');

/** MySQLのデータベースパスワード */
define('DB_PASSWORD', 'your-password');
変更を保存するには、CTRL + O を押し、Enter キーを押してから、CTRL + X で終了します。
3. Webサービスのセットアップ
権限を設定し、ドメイン用の構成ファイルを作成します:
chown www-data:www-data /var/www/domain.tld/ -R
mv /etc/nginx/conf.d/default.conf /etc/nginx/conf.d/domain.tld.conf
構成ファイル:
/etc/nginx/conf.d/domain.tld.conf

server {
  listen 80;
  listen [::]:80;
  server_name _;
  root /var/www/domain.tld;
  index index.php index.html index.htm index.nginx-debian.html;

  location / {
    try_files $uri $uri/ /index.php;
  }

  location ~ \.php$ {
    fastcgi_pass unix:/run/php/php8.2-fpm.sock;
    fastcgi_param SCRIPT_FILENAME $document_root$fastcgi_script_name;
    include fastcgi_params;
    include snippets/fastcgi-php.conf;
  }

location /phpmyadmin {
        auth_basic "Admin Login";
        auth_basic_user_file /etc/nginx/pma_access;
    }

 # 再訪問時にページを高速化するために、長期間のキャッシュを設定
  location ~* \.(jpg|jpeg|gif|png|webp|svg|woff|woff2|ttf|css|js|ico|xml)$ {
       access_log        off;
       log_not_found     off;
       expires           360d;
  }

  # 隠しファイルへのアクセスを無効化
  location ~ /\.ht {
      access_log off;
      log_not_found off;
      deny all;
  }
}
サービスを再起動します:
service nginx restart
/etc/init.d/php8.2-fpm restart
FTPユーザーのホームディレクトリを変更します:
/etc/passwd

ftpuser:x:1000:1000:,,,:/var/www/domain.tld:/bin/bash
phpMyAdminのパスを設定に合わせて変更します:
ln -s /usr/share/phpmyadmin /var/www/domain.tld/
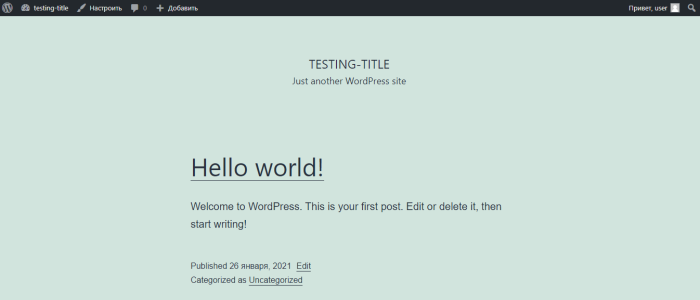
DNSエディタで設定したドメイン名「domain.tld」を、VPSサーバーのIPアドレスに置き換えます。同様の手順で複数のサイトを追加することができます。ブラウザで設定された http://domain.tld/ にアクセスし、インストールを完了させます。管理者用のユーザー名とパスワードの入力を求められ、これでインストールは完了です。サイトの移行の場合は、既存のファイルを配置し、データベースをインポートできます。
次に、ブラウザで http://server_ip/ のようなリンクを開いて、アプリケーションをテストします。
管理メニューにアクセスするには、http://server_ip/wp-adminの形式のリンクに従ってください。
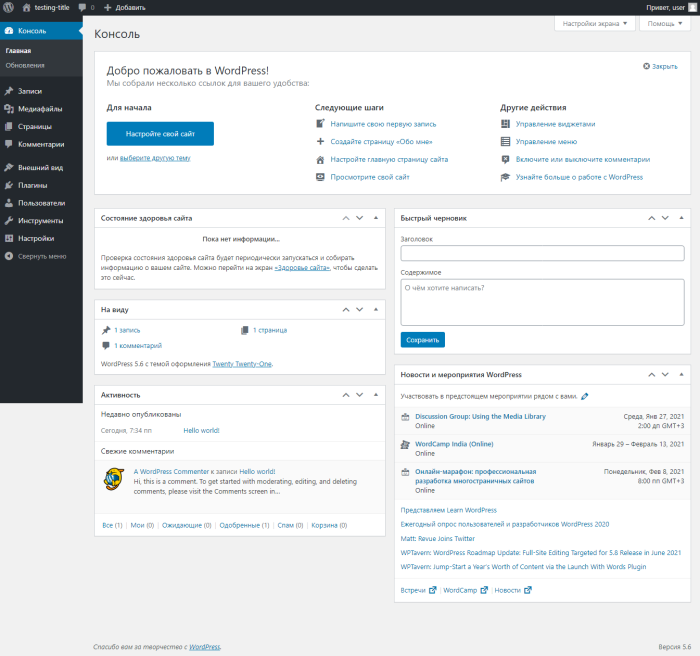
WordPressのインストールが完了しました。
No Comments Yet